An inquiry into the dynamic microorganisms in our environment.
OBJECTIVE
The living organisms in our world are varied in life form, complexity and diversity. During the course of the semester we will be looking at 4 of the 5 Kingdoms of living organism, some on a micro scale and others on a macro scale. Our systematic overview of these organisms gives you a limited general perspective of the diversity of life. This project will allow you to observe many of the smaller organisms seen in lab in a dynamic environment.
BACKGROUND
Life on earth is diverse and ubiquitous, filling large and small niches but limited by temperature, water and energy resources. Individual organisms live in a community where they are competing for space and resources. The complexity of these communities can vary depending on where they are located. Warm wet environments generally have greater species diversity than cold and/or dry environments. Within a defined environment, organisms vary greatly in size. Because of the limitation of the human eye’s perception, we divide the organisms into macro and micro categories.
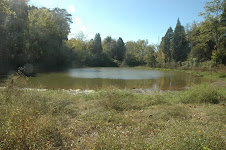
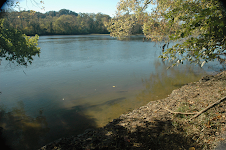
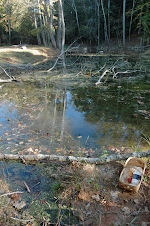
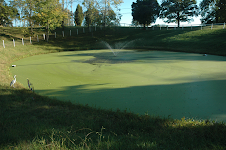
After a rain, the pool of water which forms on the previous dry sidewalk will in a short time flourish with many tiny organisms. The bark on a tree harbors many microorganisms which are usually dormant when the bark is dry. When wetted these organisms come to life but are only visible with the microscope aided eye. In ponds organism are stratified at different levels in the water – all occupying different niches. You can go anywhere in the environment, collect organic material, give it moisture and nutrients and watch the many small organisms emerge and compete among themselves for resources.
PROCEDURE
Each student will have their own MicroAquarium™ to study a collection of microorganisms. During lab (posted in syllabus) you will be setting up your individual MicroAquarium™. The MicroAquarium™ will be kept in White Ave Biology Annex room 118 – two doors from the 116 lab room.
Setting up your MicroAquarium™
In the lab will be an assortment of waters collected from various sources which can be used in your MicroAquarium™. You can also collect your own material and extract the organisms for your MicroAquarium™. Let your instructor know if you want to do the later. Record the source of material used in your aquarium.
1. Obtain a MicroAquarium™. It will have a glass tank, a stand holder and lid.
2. Using the color dots provided, code your tank as follows.
a. On the left hand side edge, place three colored dots in a vertical column as follows
i. The top dot will be the color designated for your lab section.
ii. The second dot will indicate the table you sit at during lab.
iii. The third dot will be the seat number at your table.
b. Now write your initials on the three colored dots.
3. Using a pipet, extract water from one of the containers on the lab bench or from water sources in the greenhouse or from the extraction you have created.
a. Extract enough water from the bottom of the container to fill the MicroAquarium™ tank about 1/3 full.
b. Extract the next 1/3 of water for your tank from the middle layer.
c. Then fill the rest of your tank with water from the surface.
4. Place your tank in its stand, then decorate it with some plant parts or mosses or other objects provided.
Observing the contents of your MicroAquarium™.
You can observe the contents of the MicroAquarium™- with a hand lens or microscope.
1. Using a hand lens.
a. Hold the hand lens in one hand and bring the lens up close to your eye.
b. With the other hand hold the tank, without tipping the open end, and bring it up to toward the hand lens. You will focus your view by moving the tank back and forth and not the hand lens.
2. Using the microscope.
a. Remove the stand and lid from the MicroAquarium™ tank.
b. Gentle lay the tank on the microscope stage with the open end away from you. The water will not come out. When using the compound scope you can place it in the slide holder and move the tank with the appropriate knobs. On the dissecting scope lay the tank flat and manipulate it with your fingers.
Things to look for and record.
The tank with have living organisms and various forms of debris.
1. Stationary vs. moving organisms.
2. If moving, a description of motion.
3. Single celled vs. multicellular organisms
4. Chlorophyll green vs. non-green organisms.
5. Habitat preference of the different organisms – bottom, middle or tops
6. For each organism record if you have seen only one or many of them.
Observing your MicroAquarium™ each week.
You are to come and observe your MicroAquarium™ at least once a week over the next four weeks.
BRING YOUR NOTES AND OBSERVATIONS FROM EACH WEEK
The MicroAquarium™ and other equipment will be located in room 118 of the White Avenue Biology Annex – two doors from the Botany 111 lab. With the assistance your instructors you will be identifying a few of the organisms in your tank and make some of the following observations.
1. What changes have occurred from the last observation?
2. Have the numbers of each organism increased, decreased or stayed about the same?
3. Are there dead organisms in the bottom layer of the tank?
Open times for you to come and view your MicroAquarium™ will be posted by the door of Room 118 An instructor to assist you in your observation will be present during these times.
YOUR BLOG
A community project: In order for all the students and teaching staff in the class to interact on this project, each student will record their project in a personal blog. All blogs will be indexed in a Class blog http://botany111.blogspot.com/ The class blog will provide you with information on the project as time goes on. It will also have a listing of all the other student blogs by lab sections. Your blog will be listed by your Display name, Blog title or created pseudonym which ever you prefer. We will not us your real name in the index.
How to set up a blog: Set up your blog at “Blogger.com” through Google.
1. Go to https://www.blogger.com/start
2. Follow to create a blog in 3 easy steps.
Then send the following information to botanylab@gmail.com
1. Your name and lab section - this information will NOT be displayed in the class blog index – only your lab instructor will have access to this information
2. Your Display name
3. Blog title
4. Blog address URL
5. Pseudonym if you want to create one.
6. Indicate how to list you in the class blog index – Display Name, Blog title, or created pseudonym.
What goes in your blog?
Your blog is an open notebook of your activities while working on this project. You should add to your blog each week – each week’s entry should appear before Monday of the following week.
1. Things you should include
a. The water source you used in setting up your MicroAquarium™ including other objects you might have added.
b. Observations you make each week from your MicroAquarium™.
c. When searching for information on the web include URL’s you found useful and what information was pertinent to your project.
d. A list of the organisms found in your MicroAquarium™, approximate numbers observed, date when first observed and date when last observed.
e. At least one image of an organism in your MicroAquarium™ - image equipment is available in room 118.
2. Other pertinent comments, questions, or images you want to add are up to you.
3. Since this information can be read by others make sure you compose complete sentences with correct spelling and grammar.
TERM PROJECT REPORT DUE DATE IS POSTED ON THE SYLLABUS
Submit your written term project report to your laboratory instructor. No term project reports will be accepted after the posted date. Follow the lab report style format as outlined in Appendix A of your lab book. Post your report on your blog after the term project due date.
What to include in your Lab report.
1. Real Name, Display name, Blog URL, Blog URL and pseudonym if used.
2. The observations and images you have posted in your blog.
3. An in-depth discussion on at least one of the organisms you observed.
a. Include its scientific name.
b. Its classification: Domain; Kingdom; Suberphylum; Phylum; Class; Order.
c. A description and drawing of it life cycle stages.
This information should be gathered from books, journals magazines and internet resources. Your report needs to include 3 to 5 sources. All sources are to be sited on your blog and in your lab report.
1. Citation of information used in creating your written document should follow the CBE citation guide format example at http://library.osu.edu/sites/guides/cbegd.php This site covers standard format styles for different types of information sources ie books, journals, internet etc.
a. When using information you have acquired from other sources cite the source at the end of the sentence it was used in and not at the end of paragraph.
b. Create a bibliography at the end of your report. You can refer to ‘Citation Builder’ on the UTK library ‘Citation Style’ page http://www.lib.utk.edu/refs/style.html
Wed sites of interest.
A MicroAquarium™ to Discover Life: http://www2.una.edu/microaquarium/
Microscope: http://starcentral.mbl.edu/microscope/portal.php
Micrographia: http://www.micrographia.com/index.htm
Pond life Identification kit: http://www.microscopy-uk.org.uk/index.html?http://www.microscopy-uk.org.uk/pond/index.html
The Smallest Page on the Web: http://www.microscopy-uk.org.uk/mag/indexmag.html?http://www.microscopy-uk.org.uk/mag/wimsmall/smal1.html
Monday, October 13, 2008
Subscribe to:
Comments (Atom)
